Find the post you’re looking for
Van Build
Sabbatical Year

The Walls
Rome wasn’t built in a day, and neither was the Yellow Submarine.
No, we didn’t quit the Submarine.
We took a hiatus, mostly due to traveling and weird work shifts. It also gave us time for more supplies that we couldn’t get at Big Orange to arrive. Like my wool.

Buying this submarine, we thought the build would be pretty rapid and straightforward. Joke’s on us. Decision-making is not this group’s forte and coupled with the sheer volume of options and information available, and add some lessons learned along the way (*cough spray foam cough*). I have come to the conclusion we will never finish.
Anywho, back to my wool. I watched a two minute long tutorial video and had taken a sheep science class at college. Confidence, I was not lacking. I proudly waved Jake off van duties while I took the wheel on this one.
It took multiple days to stuff every single metal hole and gap in the submarine and an entire box of wool. I am convinced at least a third of it was stuck to my clothes, in my hair and I likely swallowed some. Leinie loved it though.

Jake framed out the long wall using a complimentary pallet. Following behind his progress I added wool battens using the super technical technique with scissors and masking tape. While not fast going, it was starting to look like a real wall and we finished the weekend pretty satisfied.
Until driving, which caused all the battens to fall down. Ugh! Jake finished framing the ceiling and short wall and installed our ceiling vent during the week while we discussed walling options.
It was almost as debilitating as insulation, almost. The most common, clique choice would be tongue and groove. Everyone and their cousin have tongue and groove in their vanlife vehicle. Final decision, tongue and groove. Call us sell outs, but in all the influencers’ defense t&g is a logical choice for work ability and financially.
We got a nice, actual early start on the day (before noon). We started with the middle of the ceiling and moved outward, adding wool battens while my hands could still fit behind the boards.
It was pretty straight forward and the instant visual results made the task rather fun and motivating. The first day, we were able to complete most of the ceiling. We strung some wires through the light holes. We were pretty proud of ourselves.

The next weekend we got another relatively early start, before 11am this time(!). Having thrown a few ideas for the ceiling to wall transition we gave up and decided to start with the wall base and move upwards instead. It went quickly with the battens already heavily taped in place. We had to stop a few boards short when we ran out of wool.
Fast forward a couple weeks, a new box of wool and still no decision on the wall-to-ceiling transition. We started our now typical Vanlifing Sunday Funday with the short wall. Jake had installed our electrical system earlier in the week and would jump between ceiling lights and t&g install while I insulated and drank beer. We finished just as the sun was setting and decided to bask in the coziness of our submarine.

More Build Posts


The Floor
If the floor is the foundation, we may be in trouble…
Say the word insulation and I may very well take off running in the opposite direction.
The flooring was supposed to be an easy step. (I feel like this may be a new running theme throughout this build). We need to frame out the bottom with furring strips, fill with insulation and lay the subflooring. Easy.
What type of insulation? I feel like I have been drowning in the sheer amount of information regarding insulation and vanlife. There’s rockwool, thinsulate, spray foam, reflectix, xps board, the other rigid board kind, sheep wool and, omg, I want to pull my hair out.
Found out you also have to be concerned about mold buildup in RV’s and vans. Didn’t know that, so let’s add that to the list. And don’t blow your budget.
Too much, yes? Welcome to my life now.

After much discussion and a few beers, we decided for the floors we would prime with mold resistant Kilz and utilize XPS boards for insulation. If needed, we could add some spray foam around the gaps.
Sunday morning we lazed around for a bit to reset our engines for the day of hole plugging and priming. After a good homemade brunch and plenty of coffee we set up at the shop with our beer, beach chairs, radio and a Leinie Trail Dog supervisor.
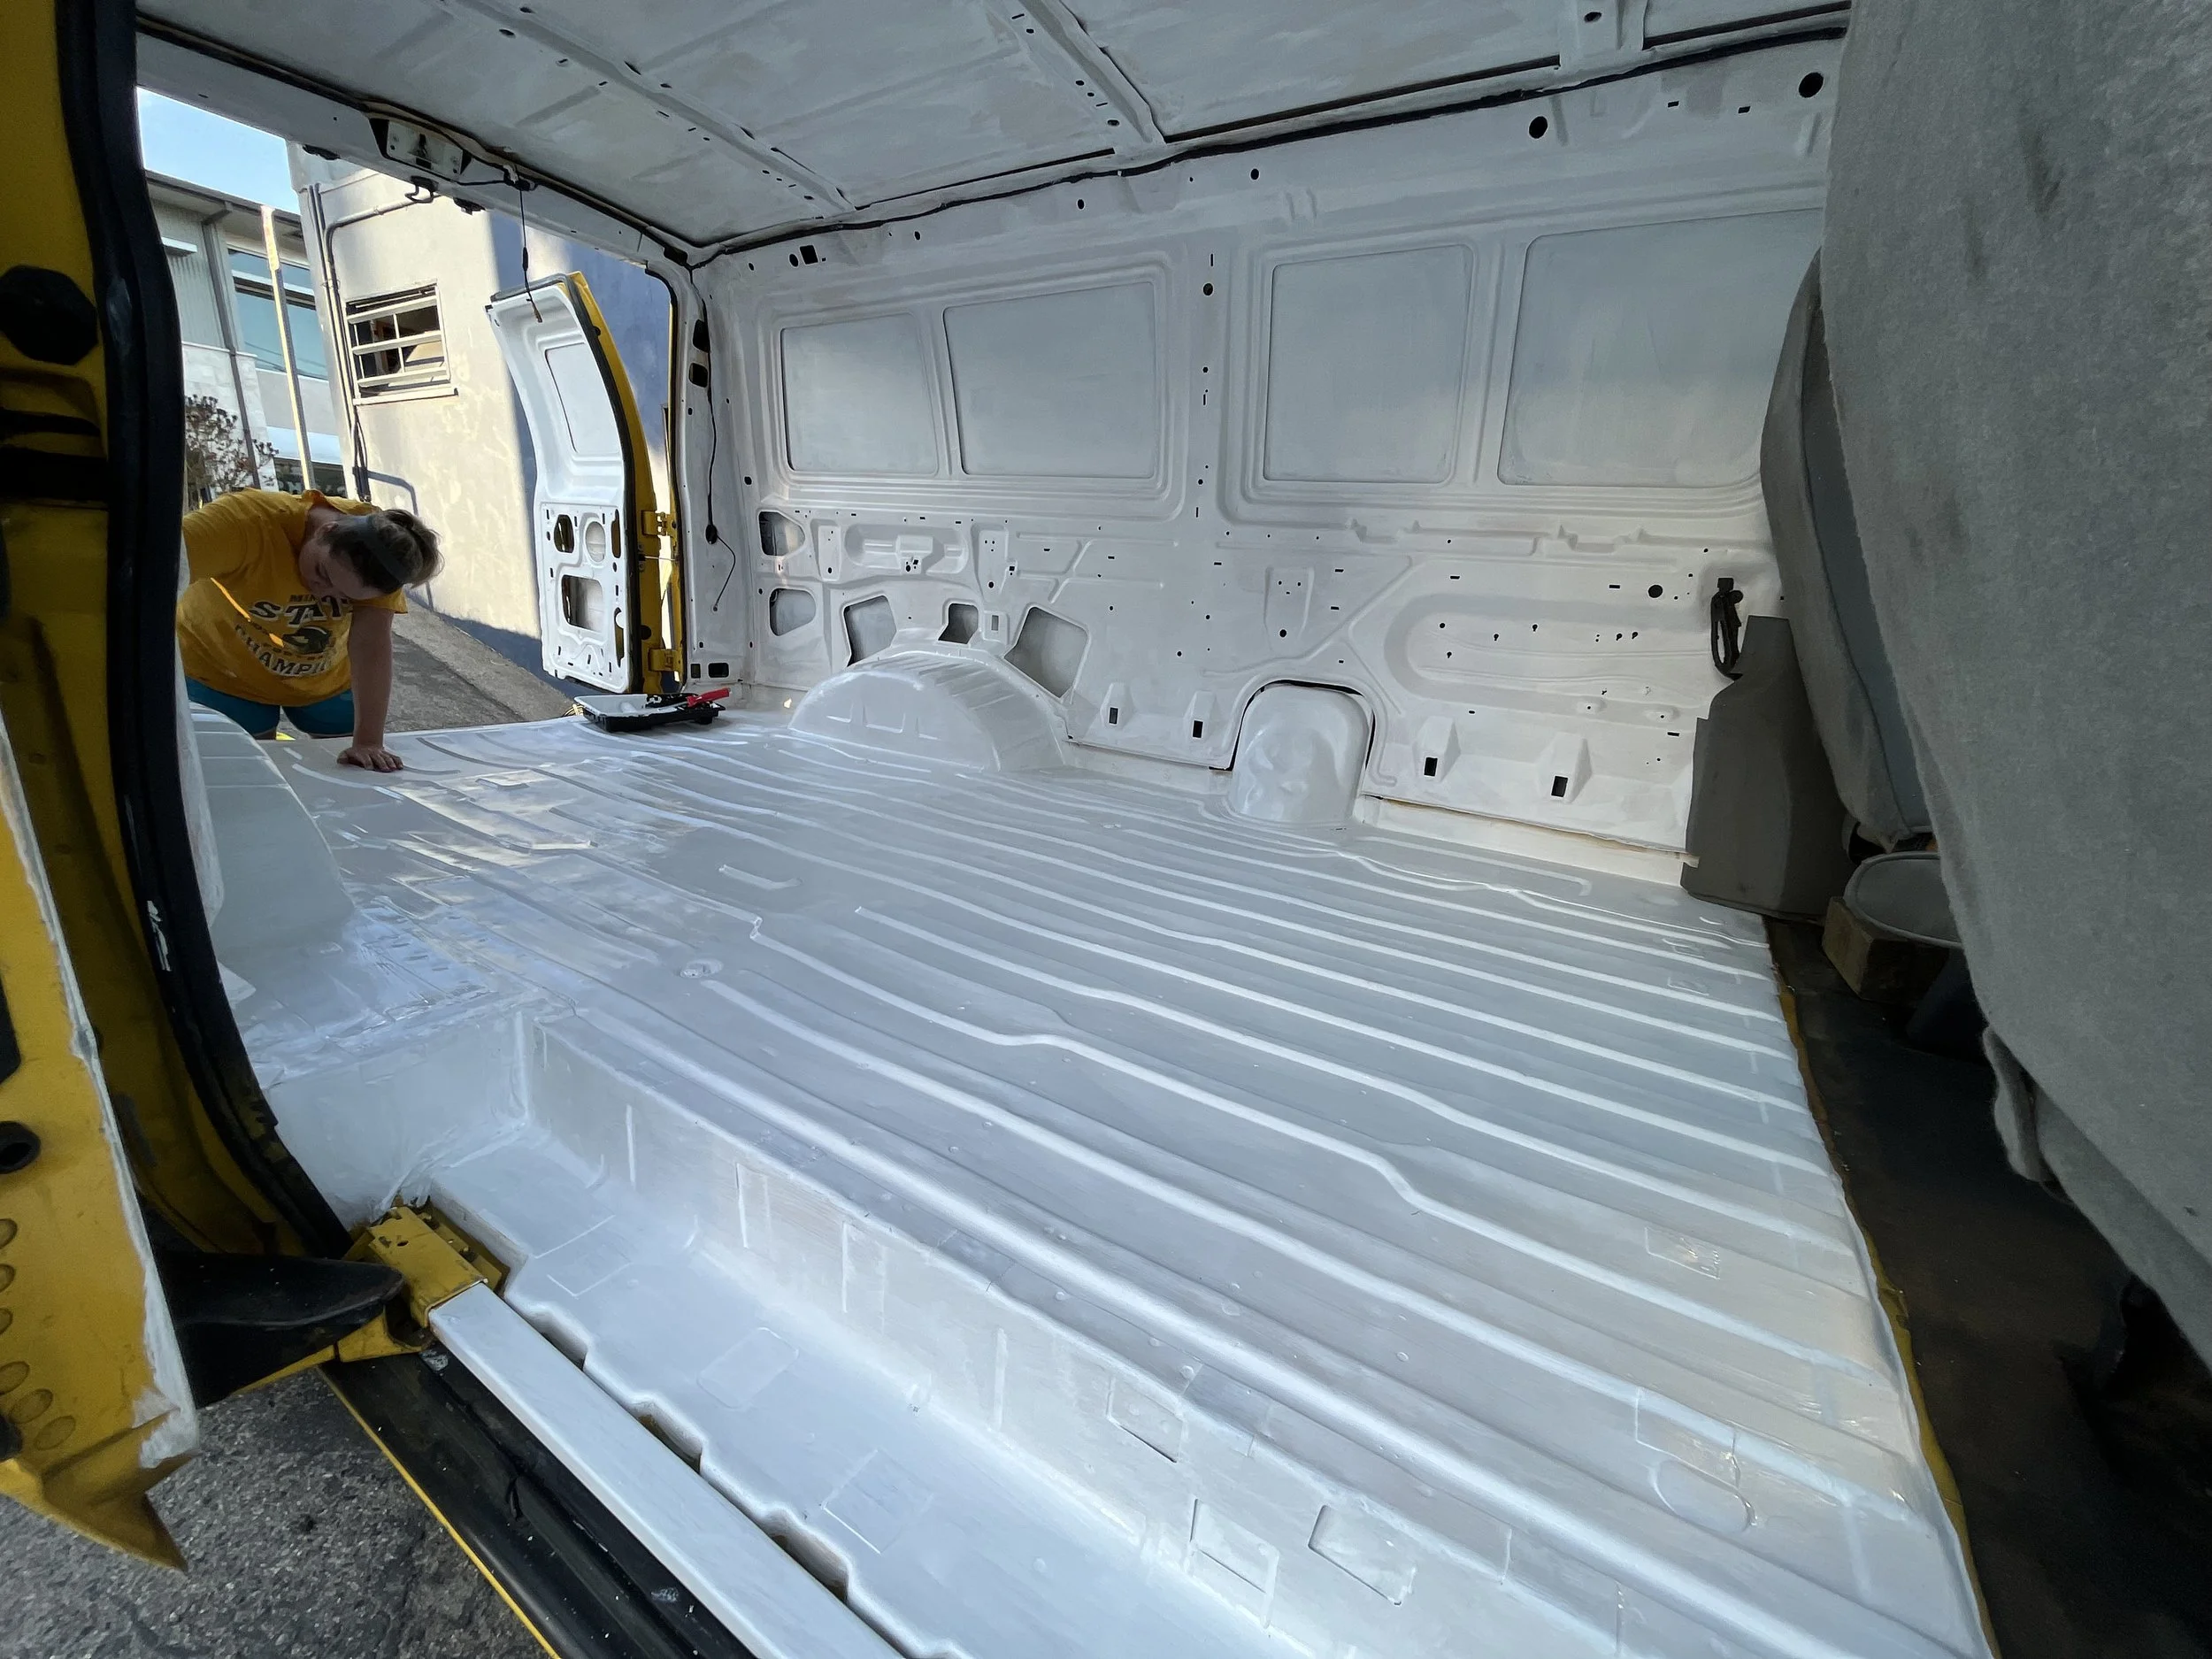
Jake started plugging holes in the floor with sealing tape and I got to it with priming. I learned very fast that the cheap roller that came with my paint tray was useless on metal. Not that it would have been that beneficial with all the dips and divots in the sub. So paintbrush it was and I had my trusty ol’ 2in angle brush with the comfort grip. Beer cracked and cold. Put me in coach, I’m ready to play today.

While some find painting tedious or down right horrible, I enjoy it, alot. I zone out and find it peaceful. There are a few things I’m rather decent at in life and cutting in without tape is one of those, thank you very much. It took almost the entire day. Jake jumped in close to the end to help speed up the process. Keep in mind, primer is not paint. It is not meant to be pretty and most of the time it’s downright ugly. But I am rather proud of this job, if I do say so myself.
That night I was woken up at 2am with a screaming claw hand of death from paintbrush painting for six hours. Aspirin and a cold pack allowed me to fall back asleep but that was a new experience for me.
Monday we hit it hard with the framing. Our furring strips would sit in the low grooves of the floor but as most things that require power tools, our floor was not flat or level. It wasn’t even close.
While Jake concentrated and cursed that the full length furring strips were not staying adhered to the floor, I attempted to cut our cross framing pieces. If you know the two of us, you’ve probably heard about the chicken coop story. Long story short, I apparently don’t hammer the right way. I fail to see how one can hammer incorrectly, but I am not the expert. You can probably see how this was a very risky move to attempt cutting our strips.
The verdict, I don’t cut the right way either but the pieces were close enough and the time limit narrowing fast enough that Jake accepted my cuttings.
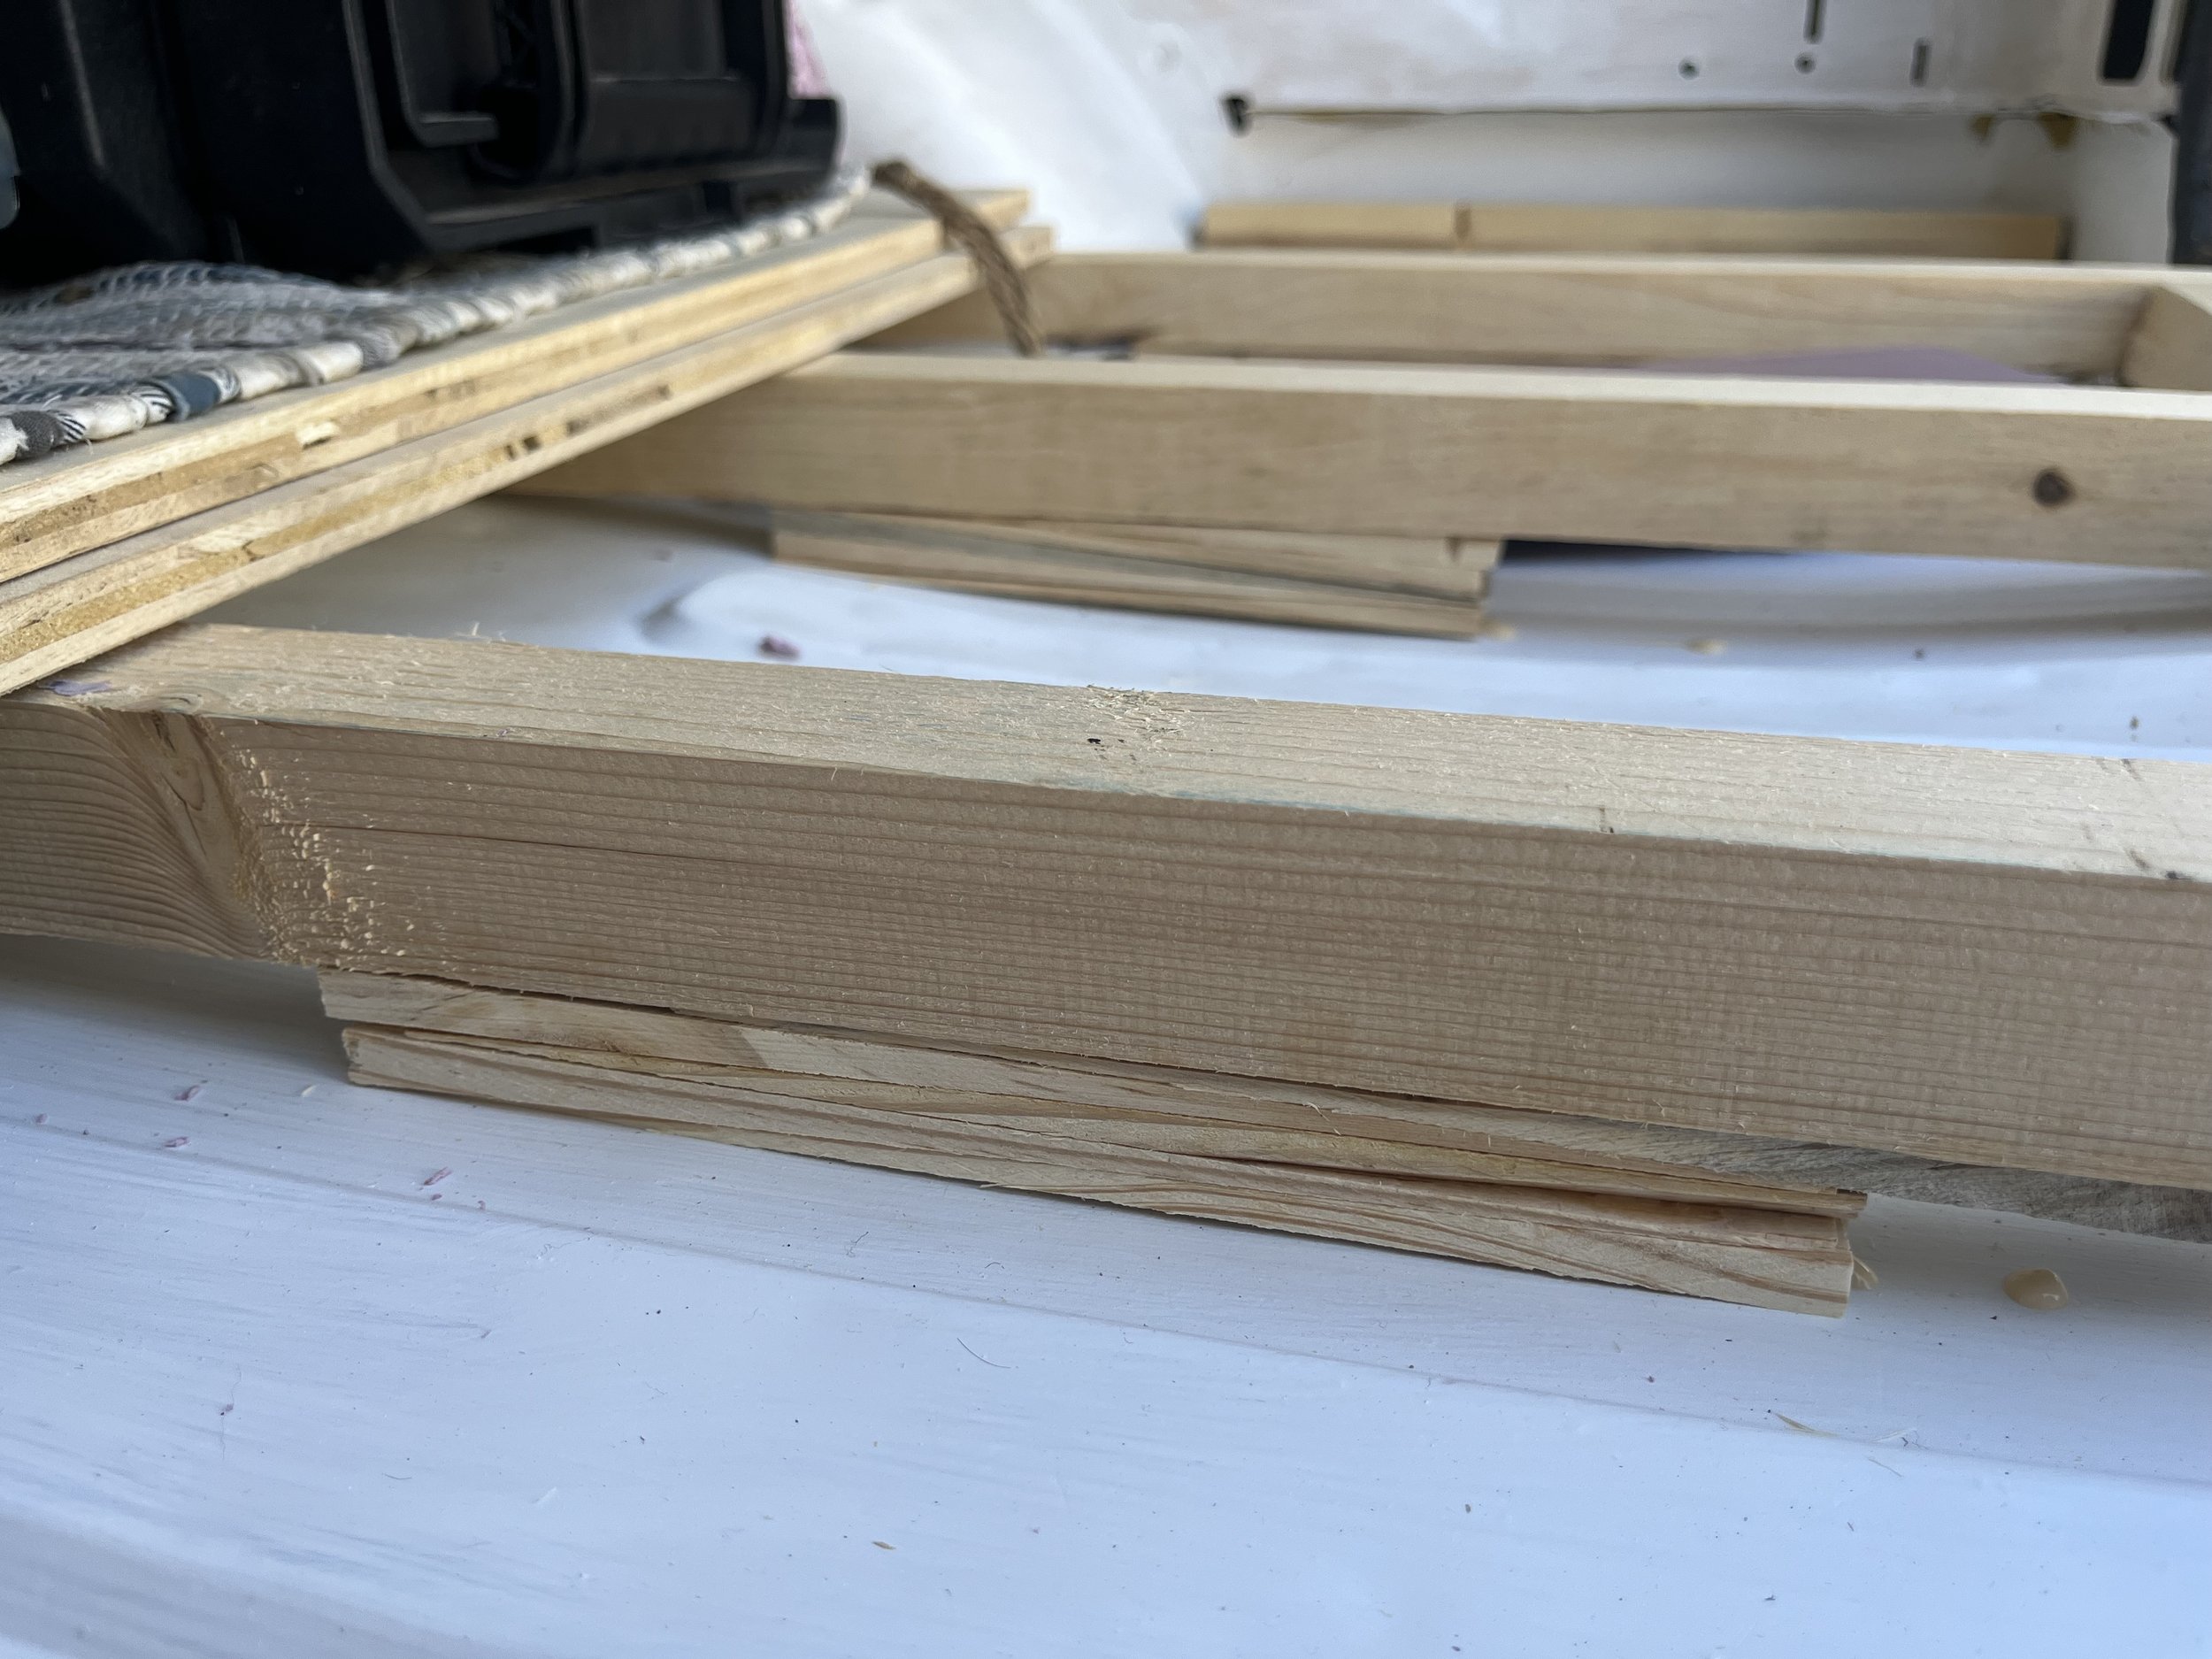
Jake continued the framing during the week and on Friday I joined again after work. Some last furring strips were cut and glued.
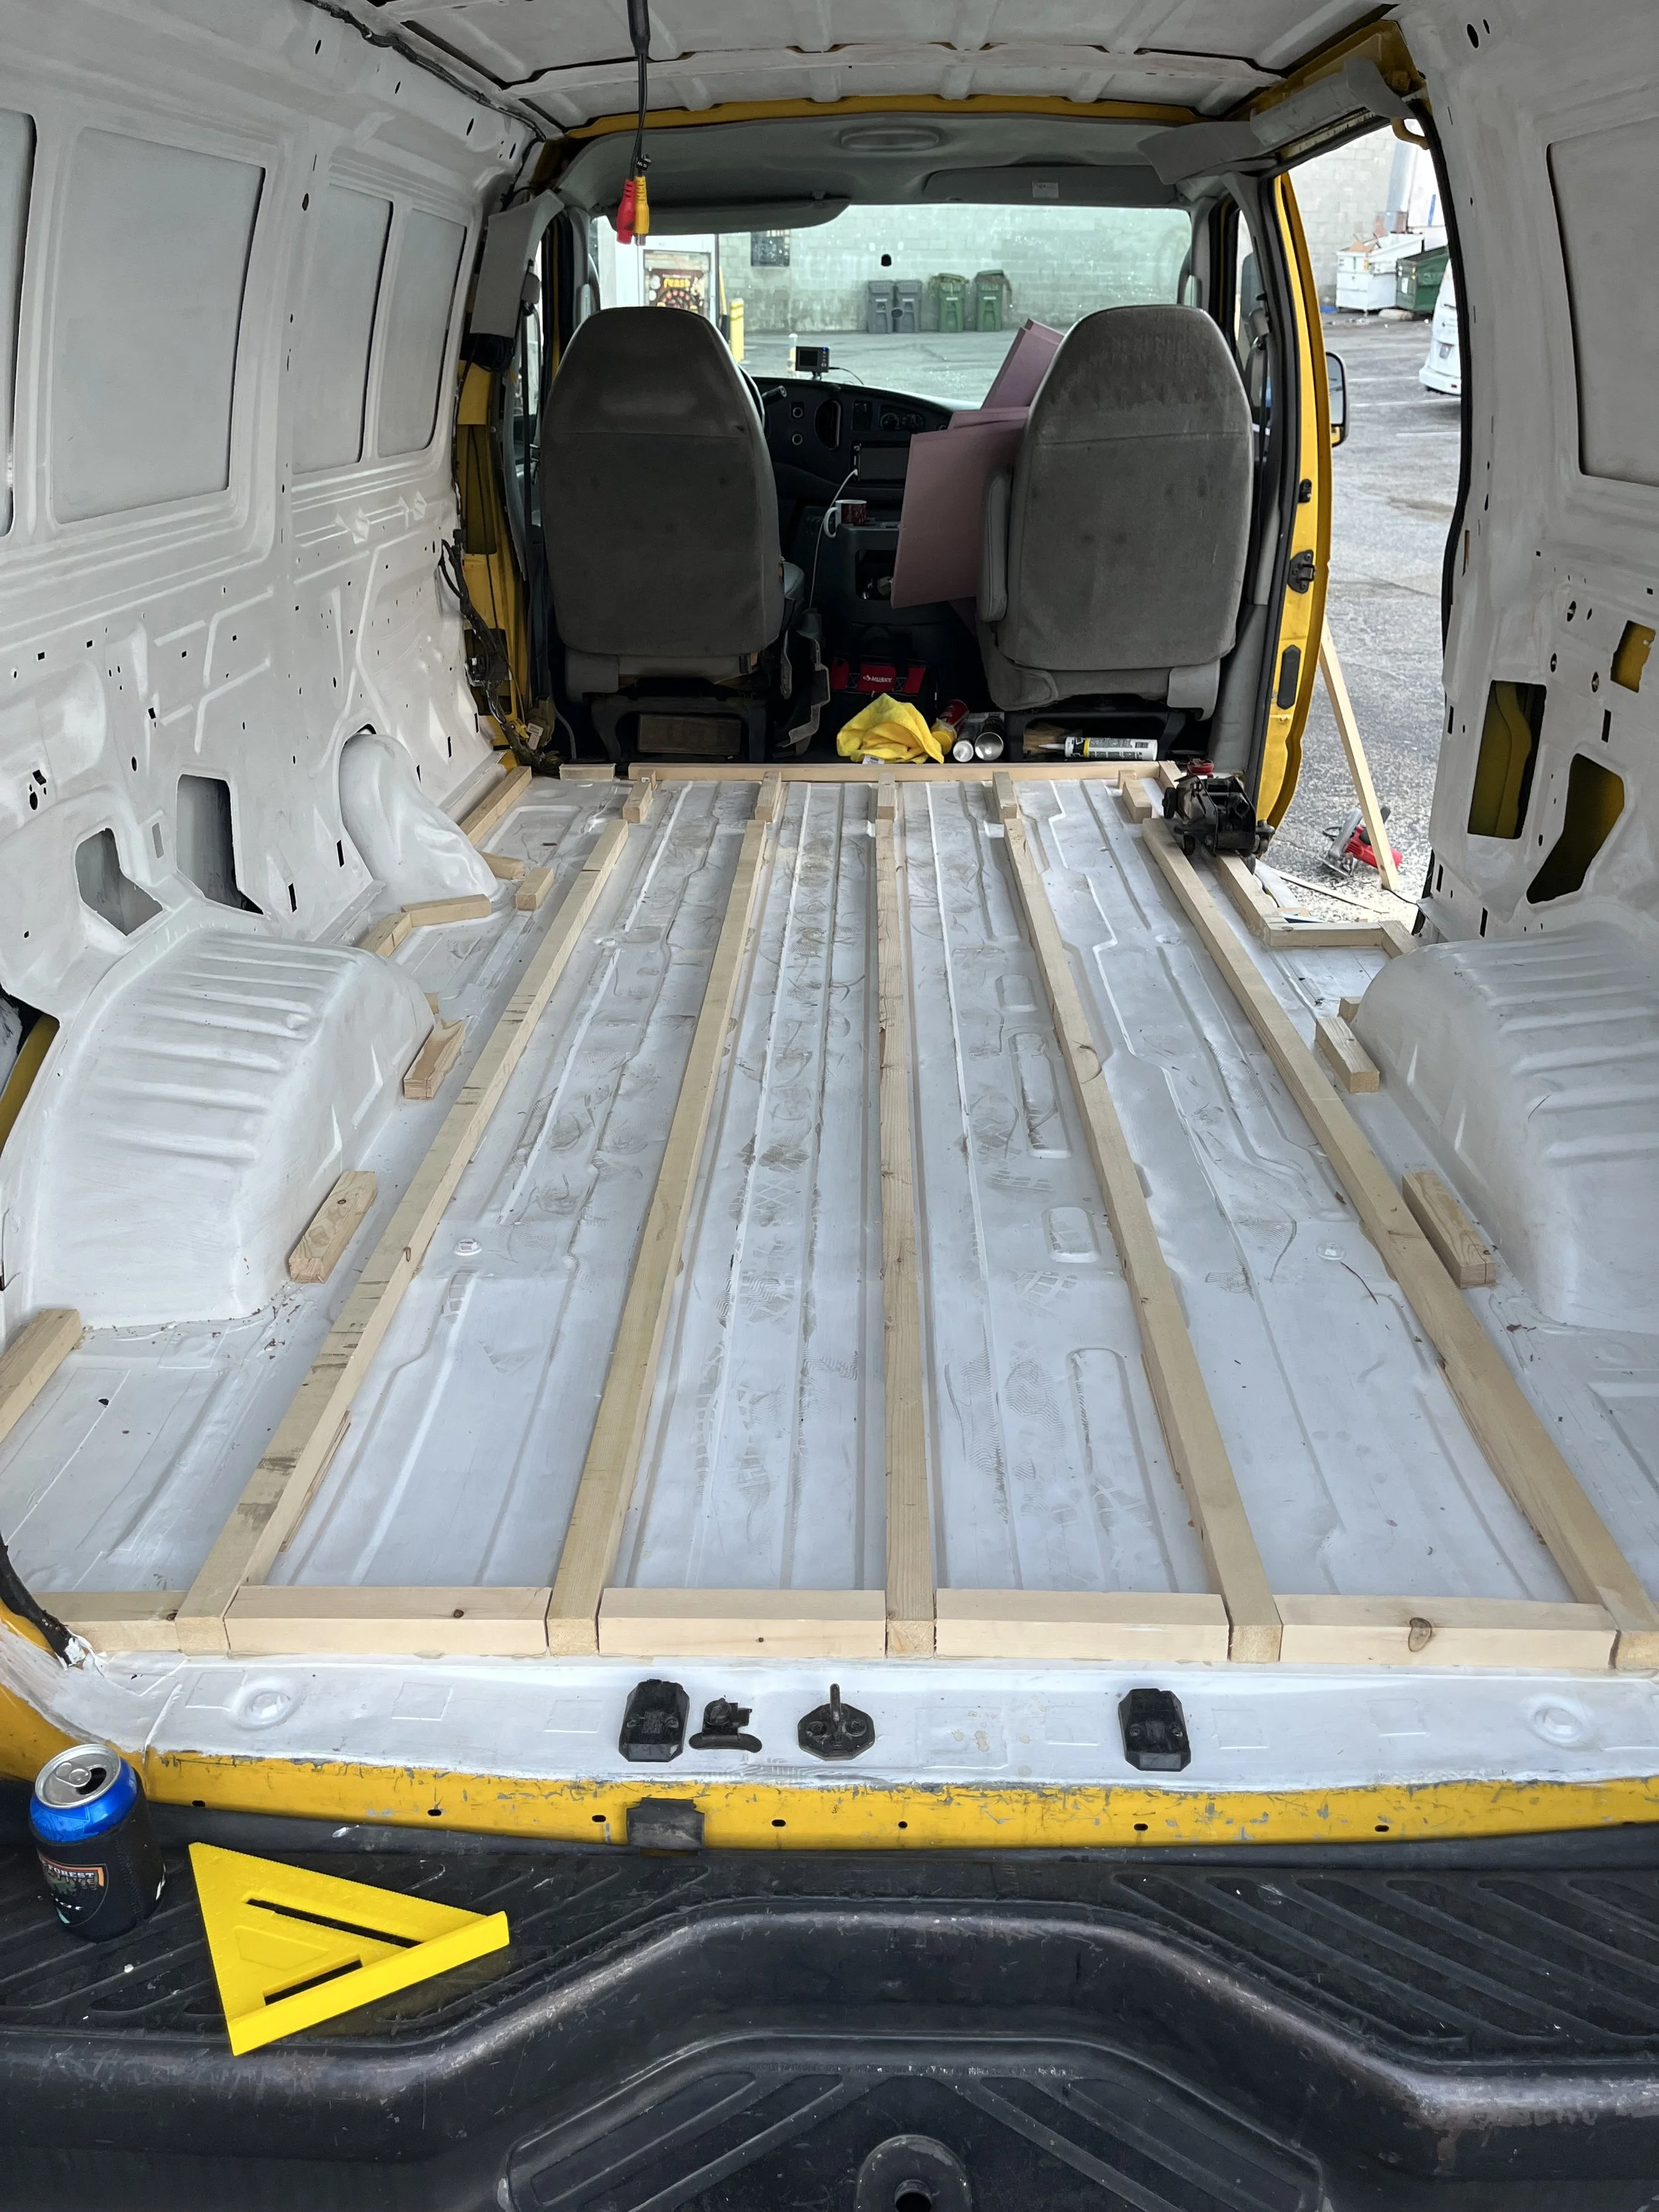
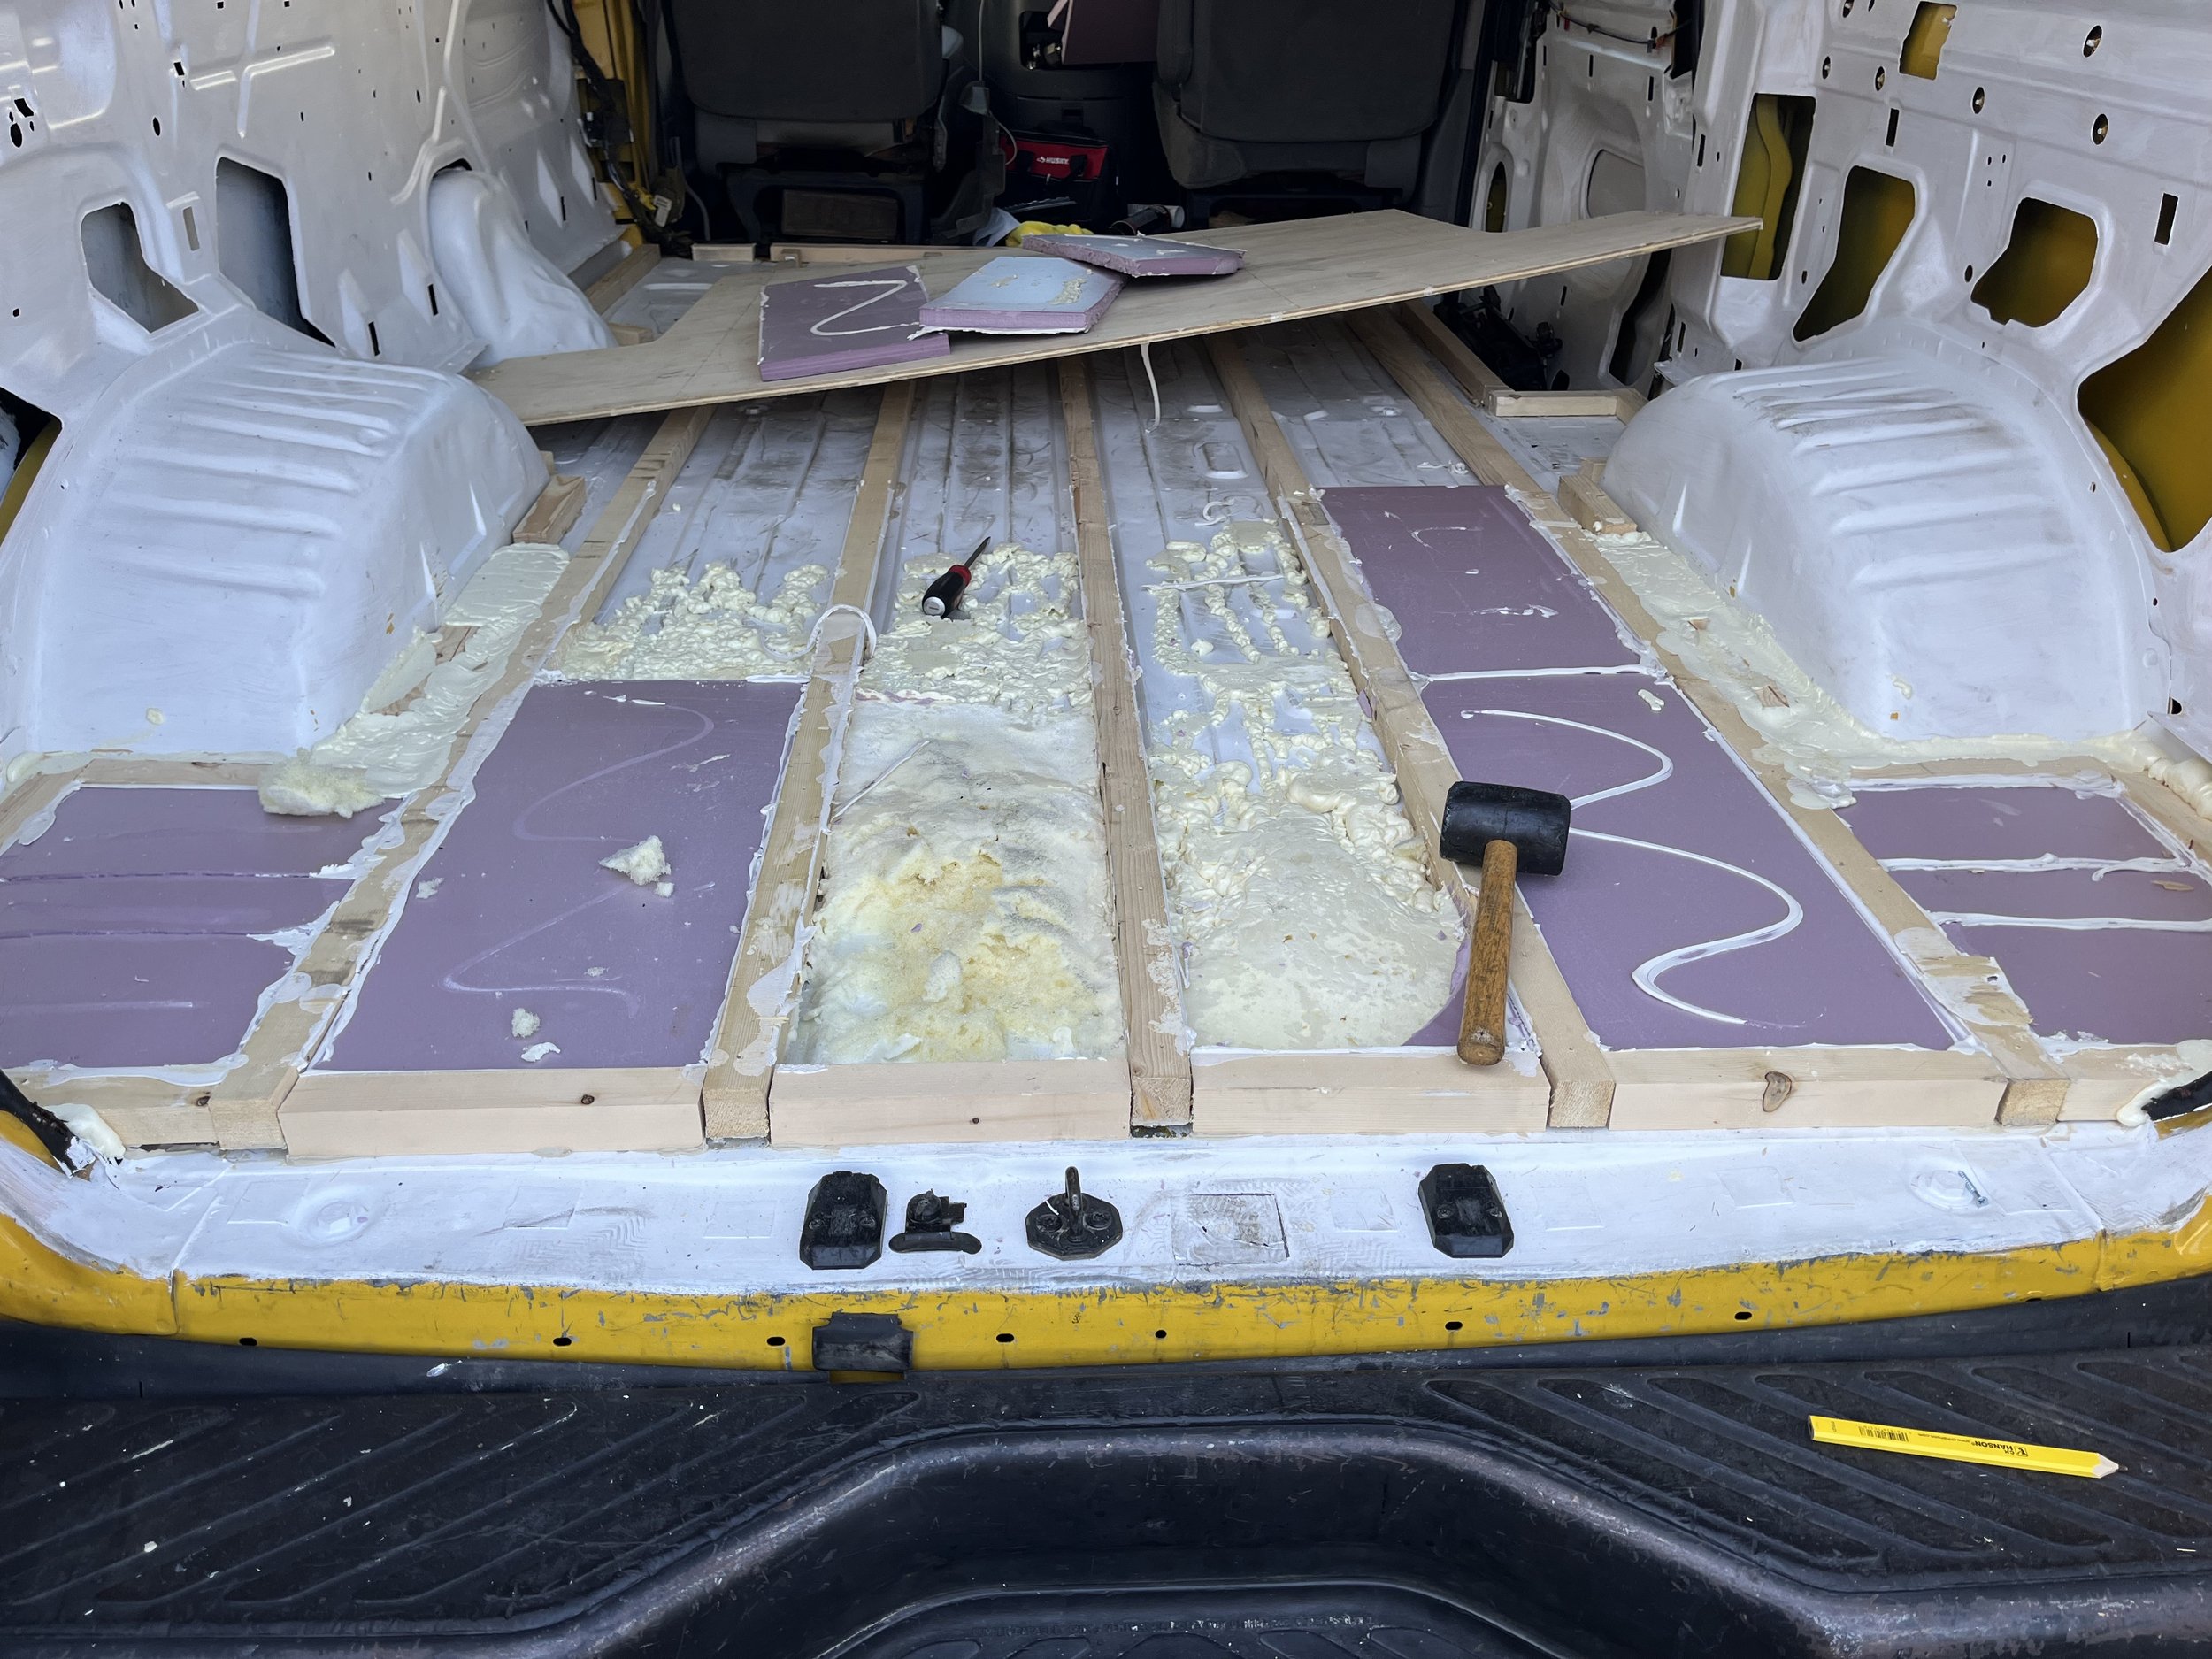
Jake began on the XPS board and spray foam filler. I traced the cardboard outline he had made earlier on our plywood subflooring.
Being bold, I said I could start the cut with the new miter saw. I could see the panic at my cutting ability and the closing window of light playing out in his eyes. Either he was drunk or starting to trust my construction abilities because he gave in and let me miter cut the board. (I’m so full of proper construction terms).
Correction: Jake has informed me it was a jig saw, not a miter saw.

Well, it was a learning curve, but I didn’t cut into the outline and stayed on the lines, which is a step above my coloring skills. We were quickly running out of usable light and Jake decided to place our first cut piece of subflooring in, adhesive and all without fitting it first. He must have been drunk, even I didn’t trust my cutting skills to cut it right to size on the first go. But in it went, with a few bends and bumps with the mallet. And wouldn’t you know, it fit.

Fast forward a couple days, we were heading out to catch the ferry to Catalina Island and made a pit stop to check out the subfloor.

Yep, that happened. Lesson learned: do not go hog wild with spray foam, you will regret it.
Jake powered through re-gutting, re-framing, re-insulating, and re-installing the subfloor over the next couple days.

I joined after work on Friday to miter saw jig saw the second subfloor board. It fit even better than the first board. Jig saw queen over here.
Another trip to Big Orange and Jake had the last piece installed the next morning. There was sweat, there was metaphorical tears, there was def some blood from scraped knuckles but our floor was in.
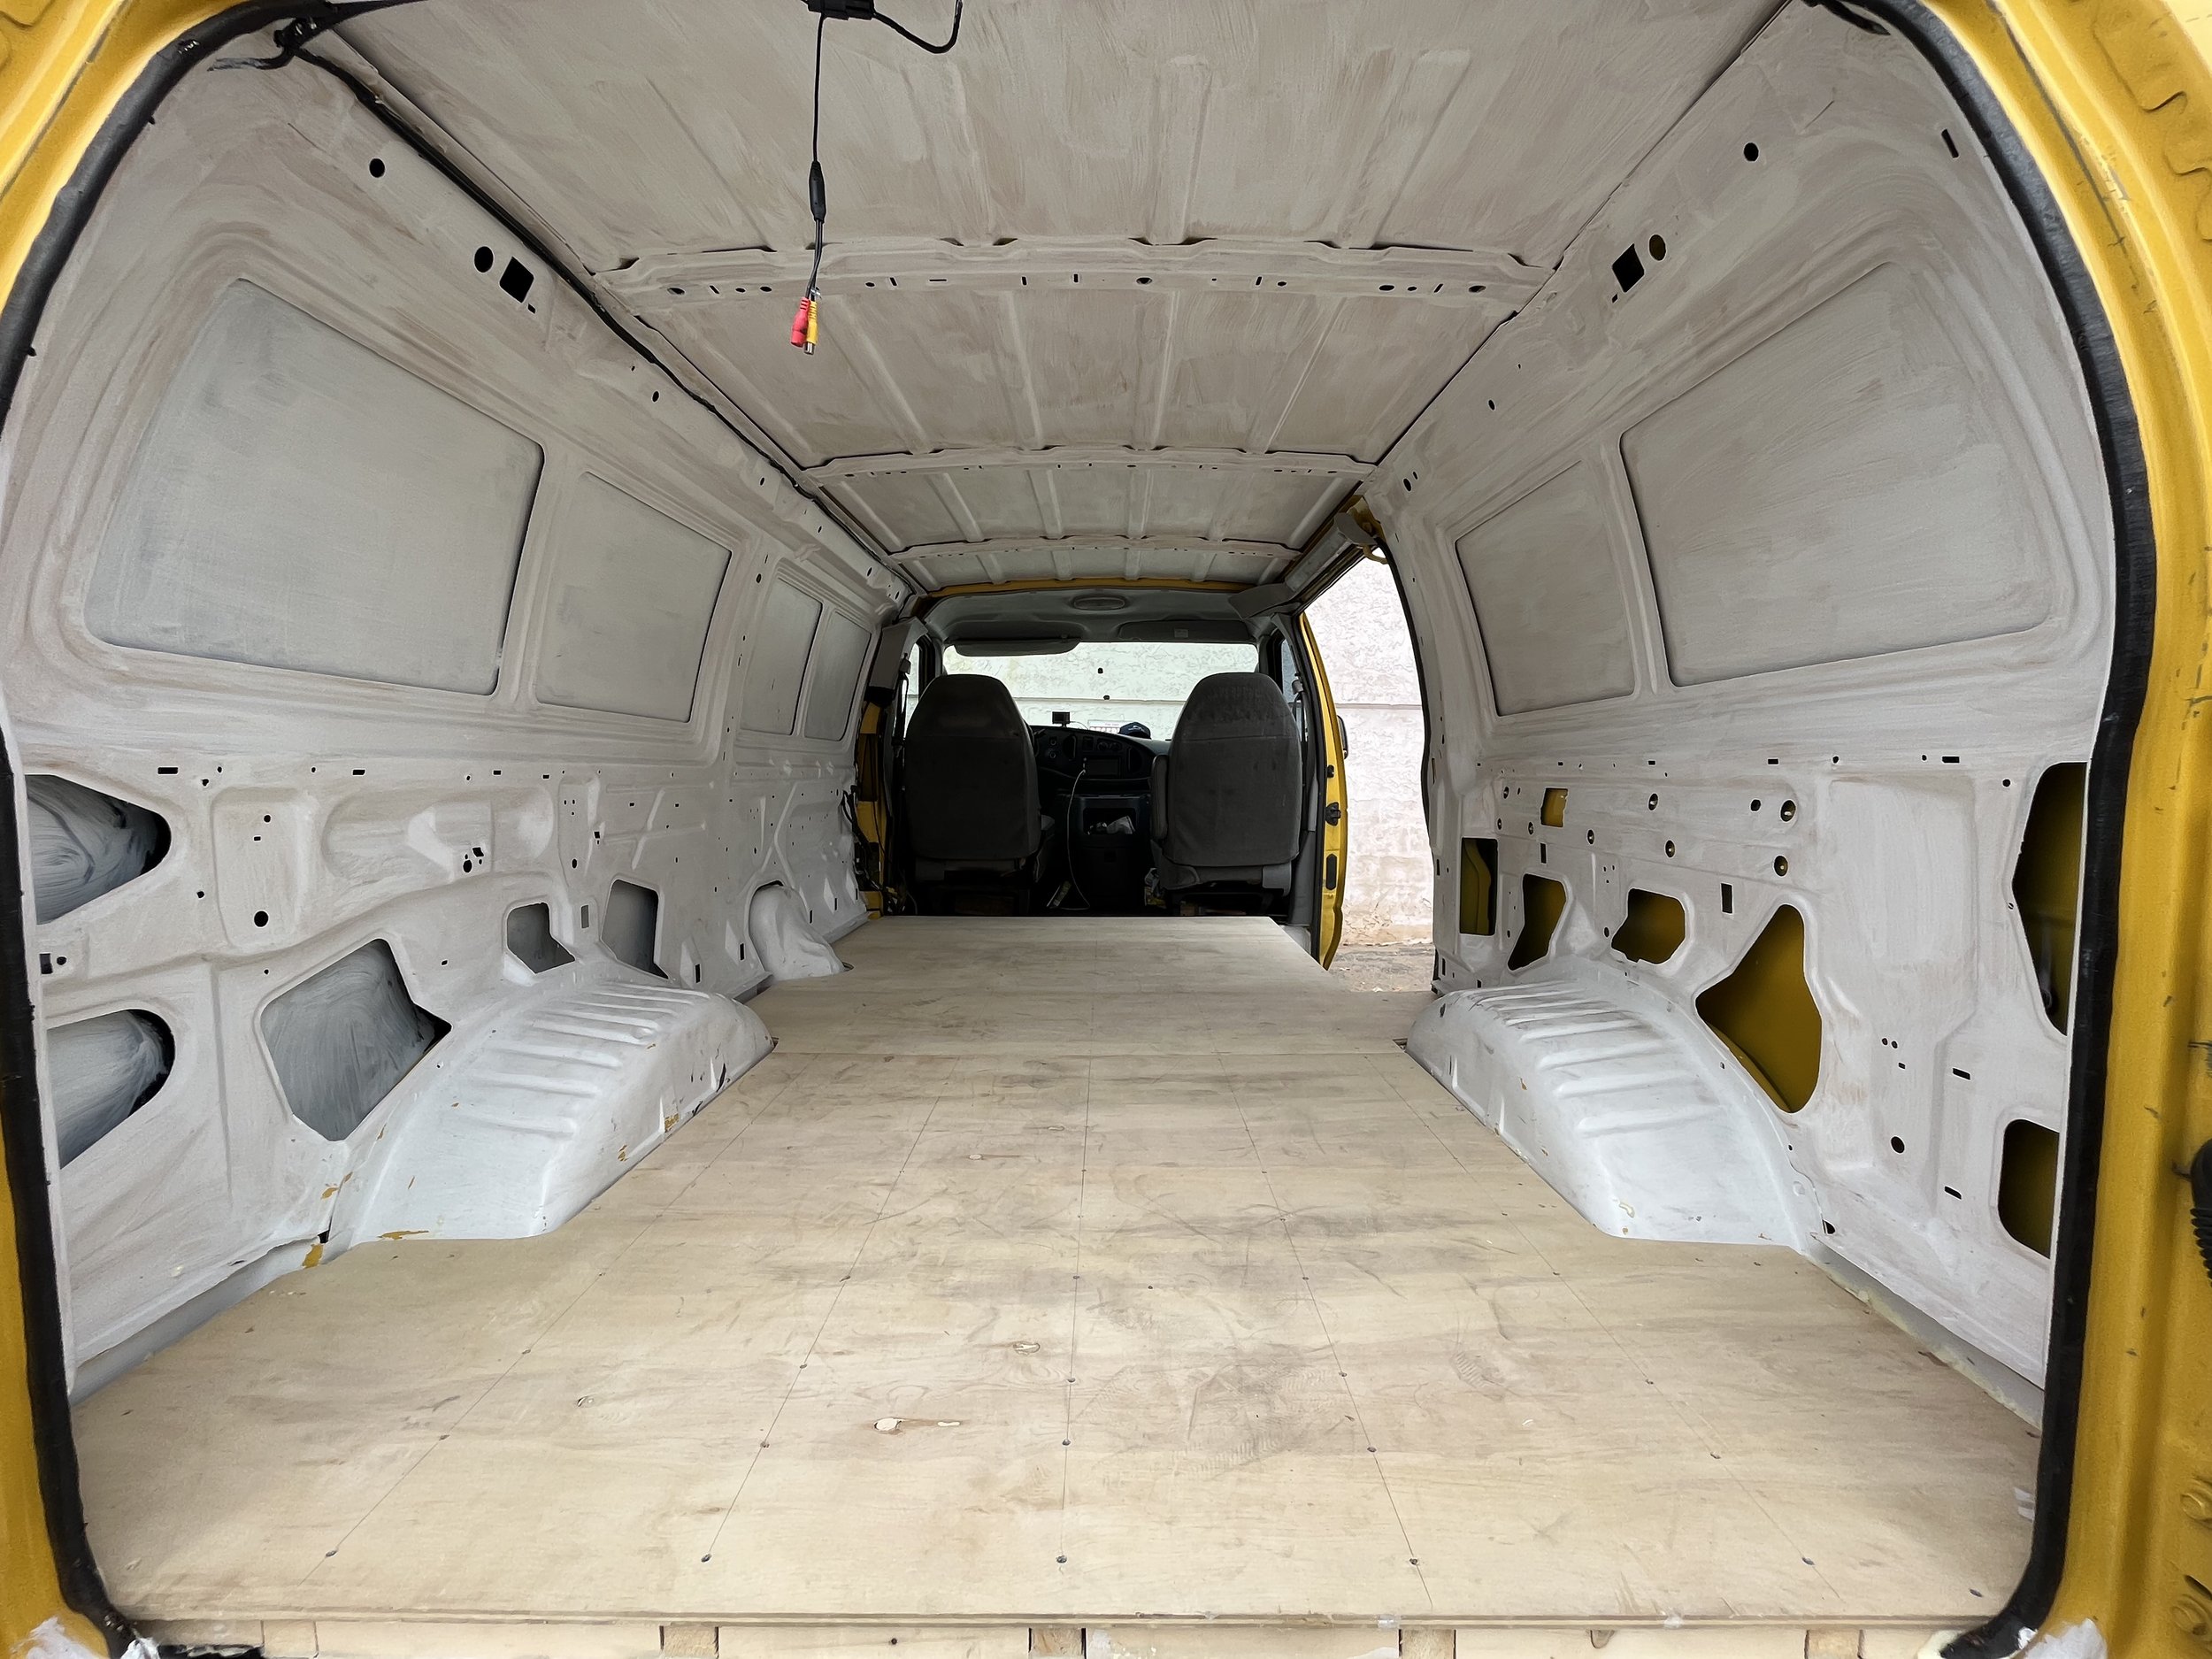
Up next, the walls.
More Build Posts
The Bones
Getting down and dirty with the Yellow Submarine.
Gutting & Cleaning. We needed to take the Sub to its bones.
Jake powered away for most of his Friday, gutting the sub of its cargo paneling. He had to grind out rivets and remove holds.
I showed up after work, ready to drink a beer and be motivational support. I excel at motivational support.
Saturday morning, we showed up bright and early (read: around noon) at our local Big Orange for some serious supplies. We were ready to get to it and our goal for the end of the day was to have the van deep cleaned and primed, ready for flooring the next day.
Leinie captained us around the store and we got wood, insulation boards, adhesive, caulk, painting supplies and primer.

Next up was the good ol’ Costco for cleaning rags, beer provisions, and gas. Man, we were killing it so far.
We arrived to the shop at a reasonable drinking time to begin the cleaning process. Beers open, rags handed out, scrubber in hand. We sprayed, we scrubbed, we wiped. Jake found more rivets to pull. Leinie supervised. I tried not to vomit at the sheer amount of dirt and grime.

Half our beer gone, the sun setting and we had only just started to finish the deep clean. I had flecks of stuff I did not care to know the identity of in my hair, clothes and likely mouth. I despise cleaning dishes at home and I was over cleaning the sub, my patience for the not fun part waning. This build was supposed to be fun. I’m not dumb or naive, I know its not all sunshine and rainbows. I just didn’t expect the first day to suck so much. Our timeline was trashed. The sheer amount of work was setting it, overwhelming my brain. I said as much to Jake and went to bed salty and disappointed in the experience.
Next step: the floor.
More Build Posts
The Plan
Where are we taking this Yellow Submarine?
Let’s talk about the plan for the Yellow Submarine.
If you gram, youtube or google vanlife builds or anything of that nature you will get a literal shit ton of posts, videos and pictures of conversions. Most of which are in the double digit thousands for the buildout in an extended cab with elevated ceiling.
We have two big dilemmas factors that are dictating our plans.
First, our budget. We started with a total budget (van+build) of $10k. Six of that went to the vehicle and another 500 to legal stuff (smog, titling, etc). That leaves us with roughly $3500 for our build, def not double digit thousands.
Second, our space. The Sub is a standard cab and base height. We have roughly 53 sq ft of space to fit our lives into. Oh, and we can’t stand up inside either.
It is easy to get overwhelmed by the sheer volume of information and options for a build online. It’s also easy to get overwhelmed by the small space and lack of basic amenities you take for granted in a traditional living space (ie, running water, easy electrical, closet space, toilets, etc). While Jake and I were crazy excited about purchasing the Sub, the reality hit us this week and we have both been feeling overwhelmed.

So instead of focusing on what the end goal would look like and picturing/planning/mapping it out. We are taking it one step at a time. We know at worst we can throw our mattress in it and fall asleep. We have ideas on what would be super awesome to have. But at the moment we are focusing on the current step, and that step alone.
First step: gutting and cleaning.
More Build Posts
The Vehicle
Getting to know the sub on a personal level…
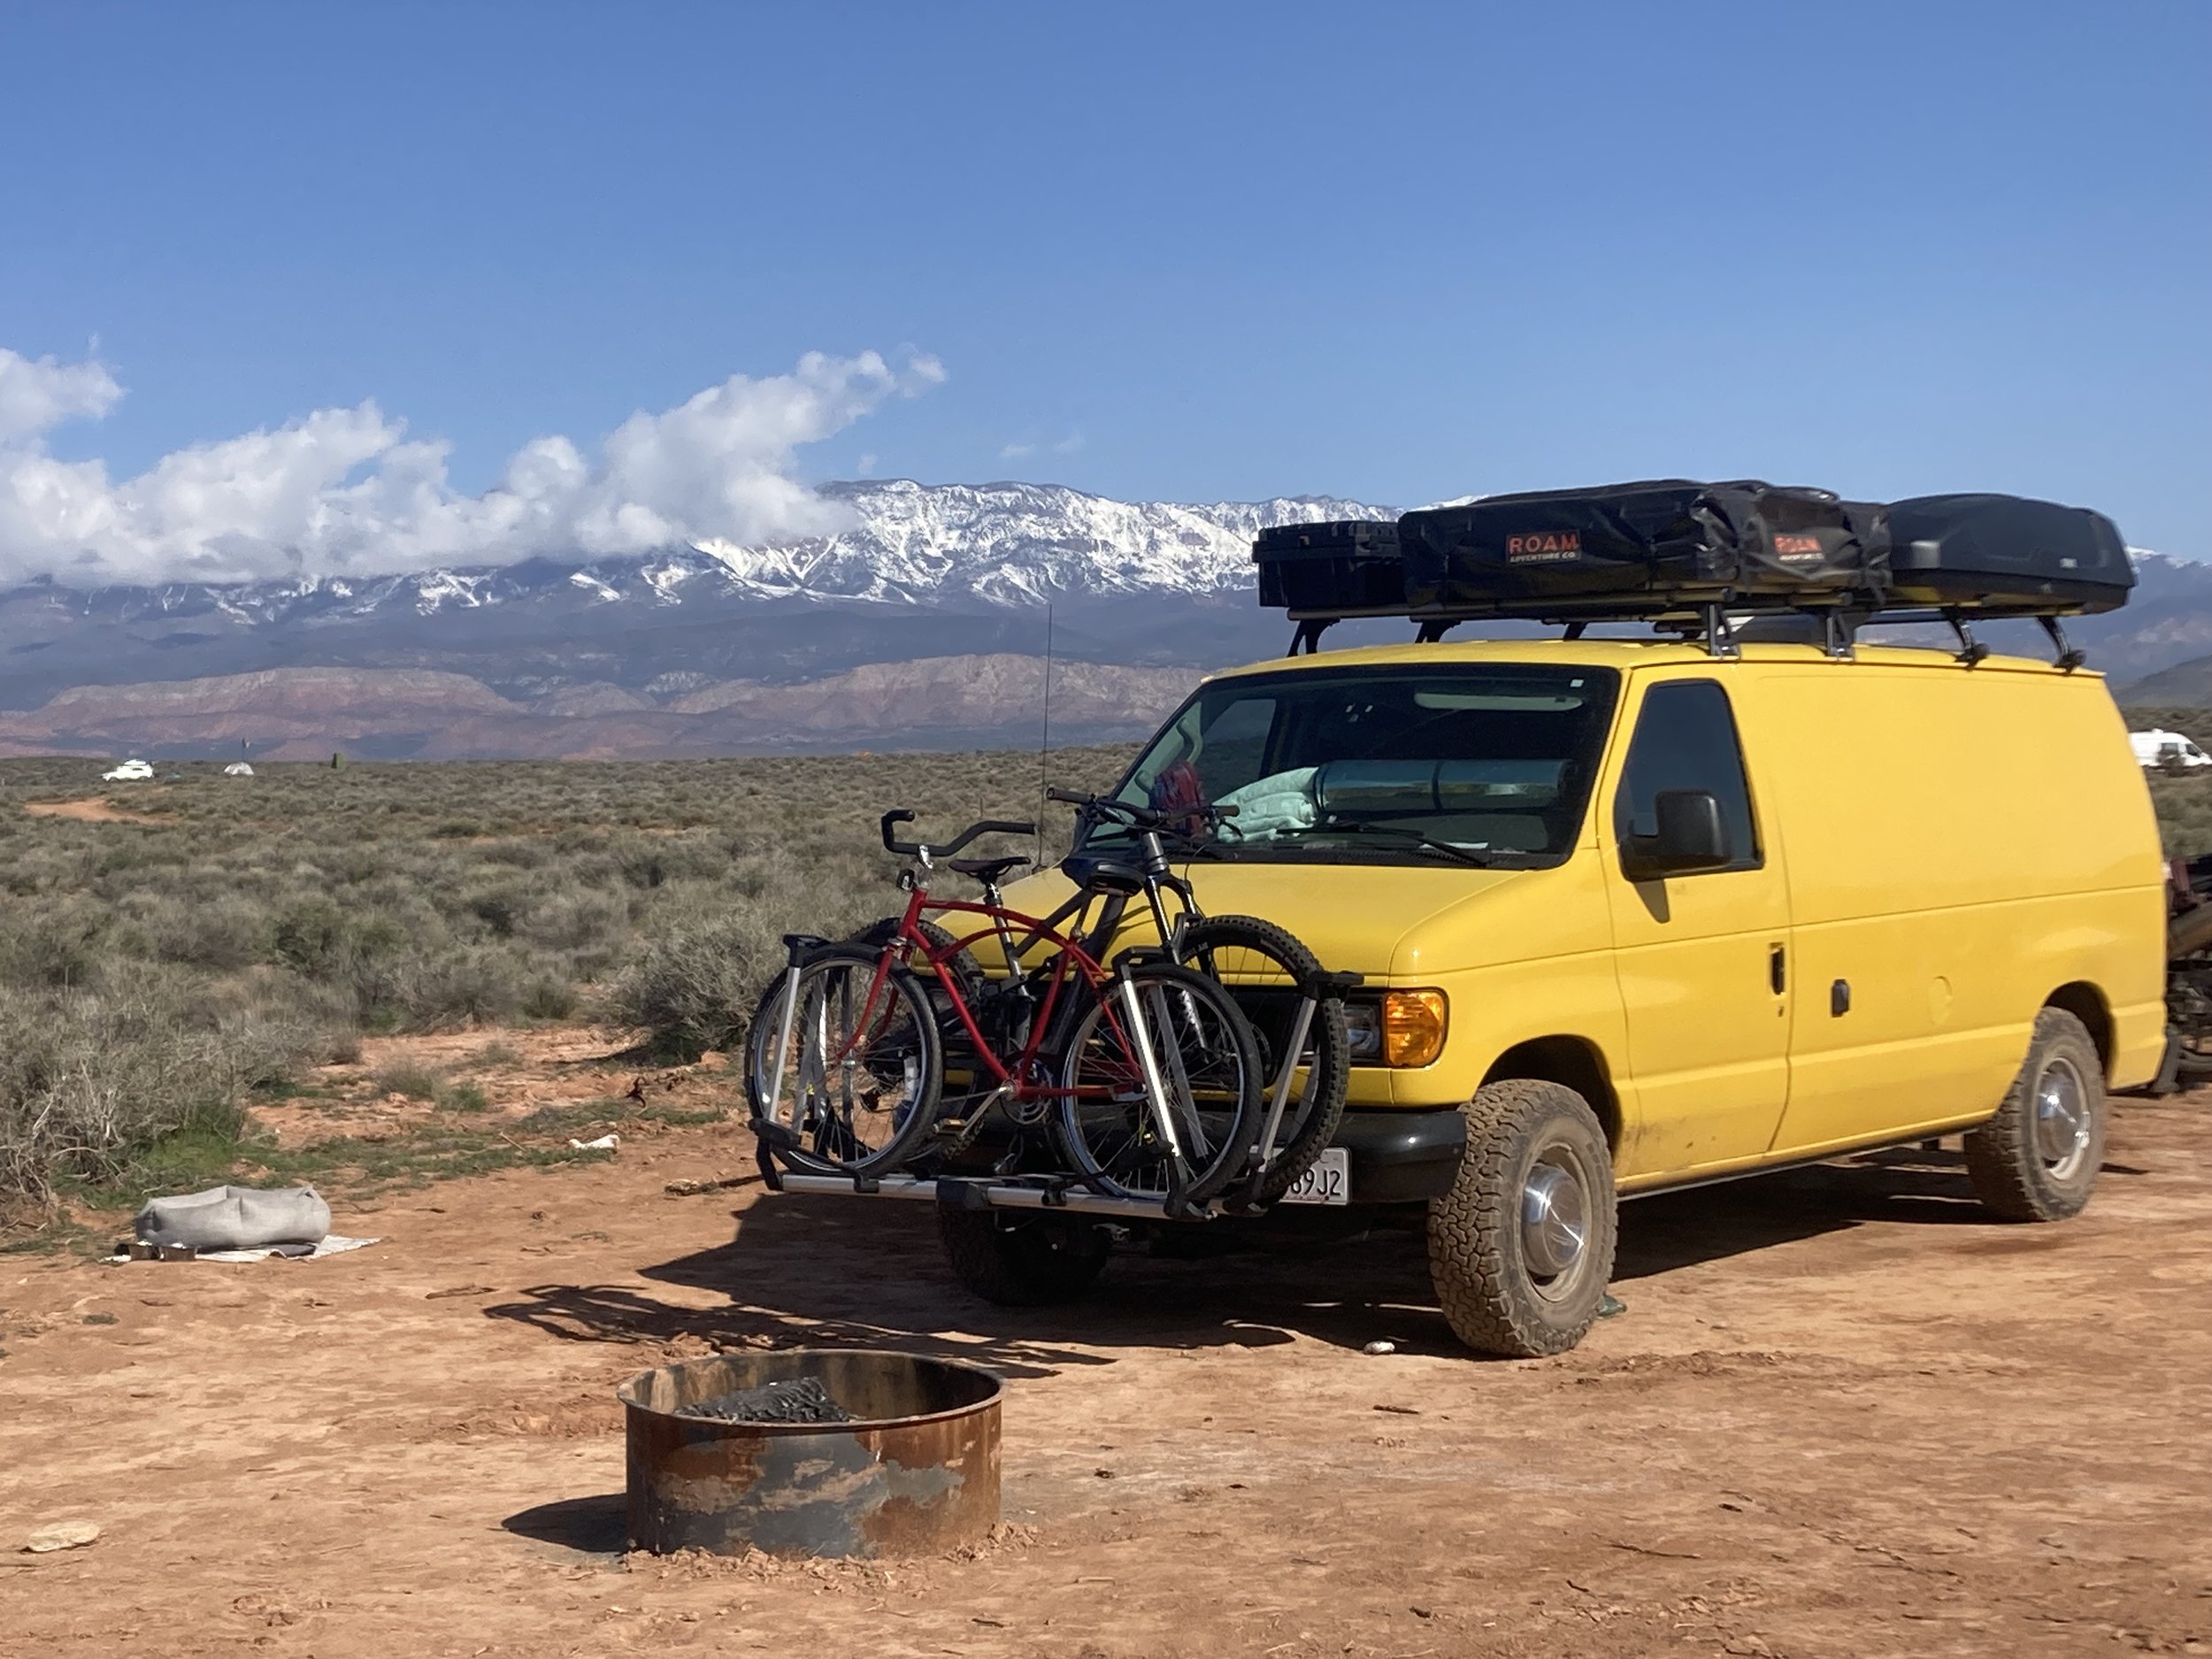
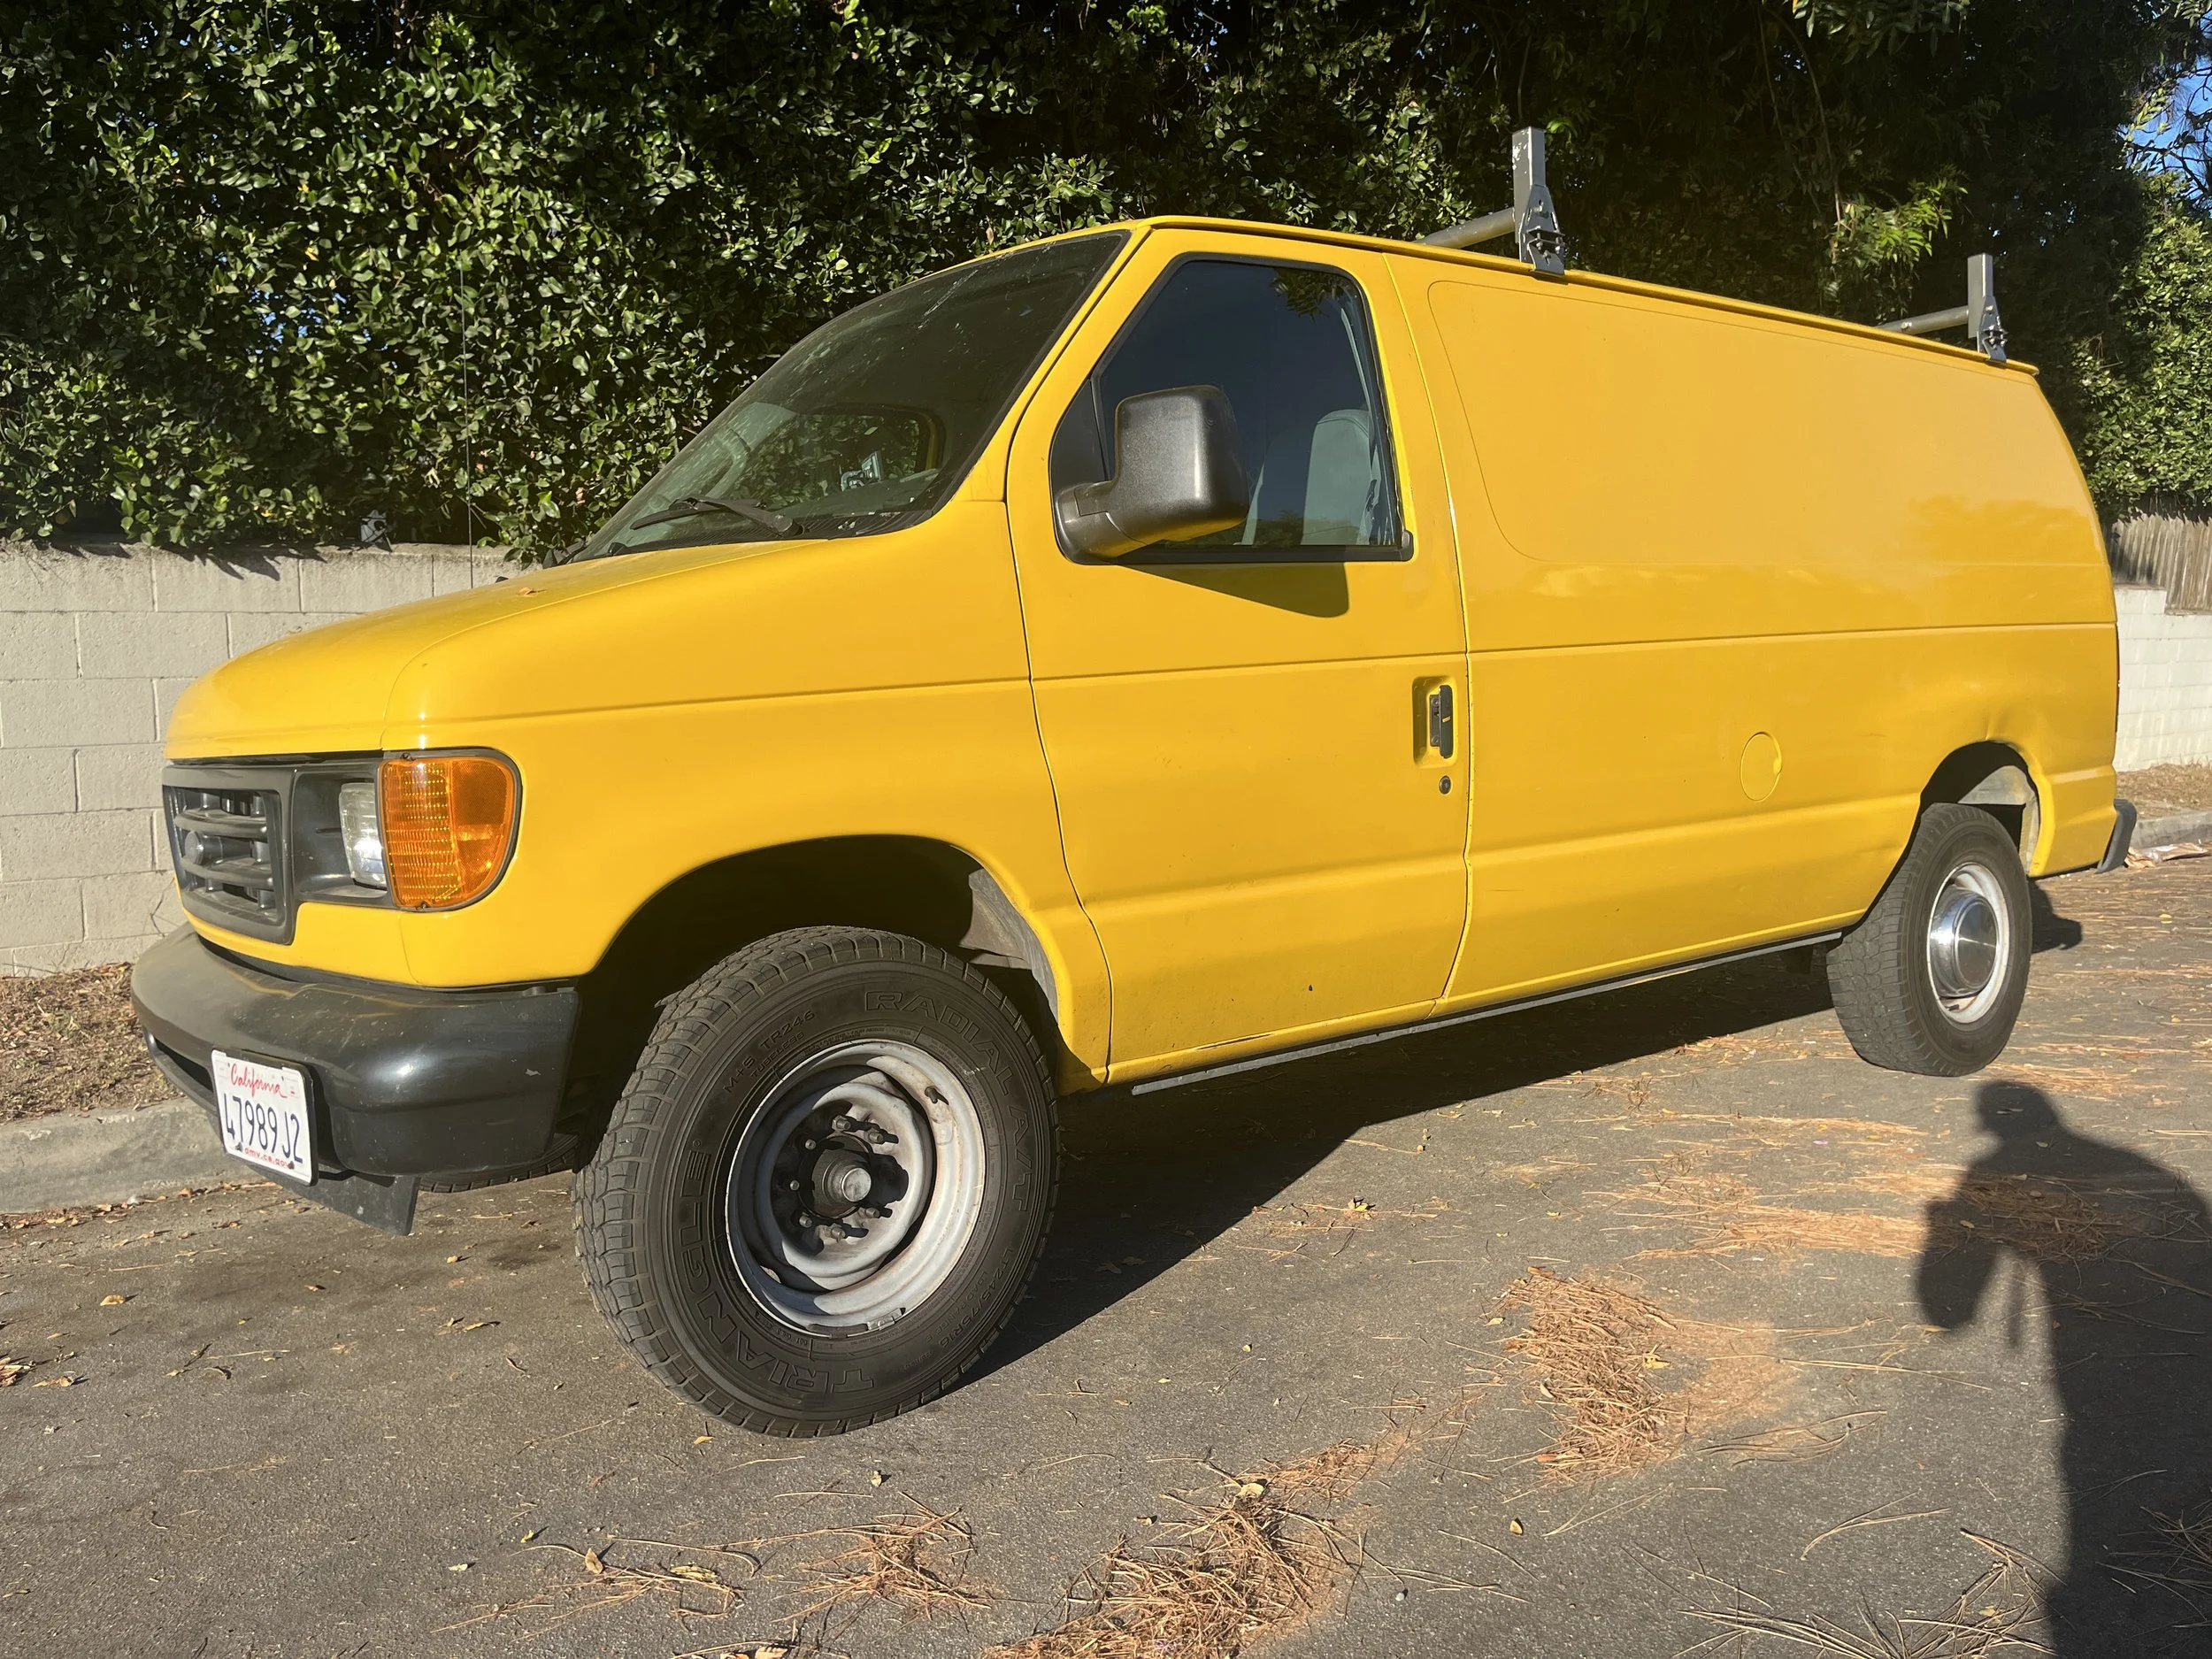
The Yellow Submarine.
Let’s dive deeper, get to know it on a more personal level. FYI, these posts were supposed to be authored by Jake but he declined in order to focus on the build so you get my lovely commentary.
A 2005 Ford E-250 Econoline commercial van with 170xxx miles, 4.6L V8 engine RWD that takes gas, not diesel…did I get that right Jake? Yes, I did.

For those of us who aren’t fluent in car. It’s a mature van without rear windows and decent mileage. Gas is cheaper than diesel and the engine would require cheaper, easier repairs. However, it won’t last forever as a diesel would and we won’t be able to utilize the diesel idling feature for the electrical needs. Rear wheel drive is not ideal in wet conditions but we could convert to four wheel drive in the future if we desired to and were willing to pay the price.
So it should be easy-ish to maintain and repair, reliable and still have some shelf life to it yet.
And it’s in Cyclone Yellow.
Let’s take a closer look inside. We have the driver and passenger seats with the basic dashboard. Someone installed a rearview camera that works when in reverse. Manual windows and mirrors.
A metal divider separates the front from the back and it is basically bare inside the cargo hold. The cab is standard length and height instead of the extended cab or elevated roof. This directly translates to less room for the build and we can’t stand up in the back.

Up top, we have commercial roof bars. Underneath, a hitch has already been installed that is good up to ~500lbs. The vehicle itself has decent clearance underneath and absolutely no rust.

It passed smog (important in SoCal), title transfer went without a hitch and the tabs are good for another few months.
More Build Posts
The Idea
Our family is expanding…
We interrupt your normal broadcasting for this important message: our family is expanding.
May I introduce the Yellow Submarine
Jake has been wearing me down Jake and I have been discussing the idea of a stealth camping vehicle since moving to SoCal. It would solve a lot of the random issues we sometimes find ourselves in. Windstorm in Death Valley. Visiting XYZ town where hotels are hella expensive. Delaying the start of a roadtrip due to lack of camping options enroute. ISU tailgating and bowl games stuck in the back middle seat of a truck and wanting to jump into traffic to escape that particular hell.

So ya see the need?
We started with a blank slate and a budget of $10k to include the vehicle and any sort of build out that would be required. Any vehicle we could reasonably and comfortably sleep in were considered. We looked at 4Runners, nope is all I will say about that experience. Foresters, too tight. Sprinters, too expensive.
And then we found an ambulance. A Ford E-350 old skool ambulance to be exact. I fell in love with the picture online. Jake was more logical. It could have engine issues, high mileage, dead people and ghosts. We saw it in person and we both loved it. One problem, no current title.

This started the ambulance spiral. All of a sudden we wanted an ambulance, a box truck, maybe even an overhead space for a lofted mattress. And then we saw the prices…back to the original search.
We saw vehicles and met some scammers. Oh, its in your uncle’s name with a replacement title? Your boss’s vehicle, you say, she isn’t in town? The carfax says 80k more miles….no title, engine light flashing, broken windows. One weekend, after five hours of driving around the greater LA area, we took a break at a brewery. I took over looking at ads.
There it was, a Ford E-250 van with a roof rack and the best part was, it was yellow. Cyclone Yellow, to be exact. It was calling to me. Jake confirmed that he had reviewed the listing but passed it over because of the color.

He hates the color yellow. How are we together?! I made a compromise, let’s look at it. We don’t have to buy it, but if it fits the bill I will be the one to repaint it.
After much convincing we were sitting in a parking lot waiting for the yellow van the very next day. The guy was real, the owner listed on the title and had current tabs. Anyone hear the angels singing yet? The engine was in good shape, tires decent, just a few dents and scratches on the body. Took it for a ride, drove the best of all the vehicles we tried. We negotiated and a fair price left both sides feeling good.
We celebrated with drinks and daydreaming of our soon-to-be sick-ass-build.
More Build Posts

Don’t leave just yet!
Subscribe to get our awesome posts…
For as much as we love the outdoors, we also love a good lazy Sunday.